![[Note]](/media/com_docimport/admonition/note.png) | Note |
|---|---|
|
This feature is only available in the Professional release |
![[Warning]](/media/com_docimport/admonition/warning.png) | Warning |
|---|---|
|
This feature is only available on servers running the NginX web server. If your server is using Apache or IIS the button to launch this feature will not be shown. If the server type cannot be detected you will see this feature but you should consult with your host whether it will have any effect and how to use it.. |
One of the most important aspects of managing a web site hosted on an NginX server is being able to fine-tune your site configuration file. This file is responsible for many web server level tweaks, such as enabling the use of search engine friendly (SEF) URLs, blocking access to system files which should not be accessible from the web, redirecting between pages based on custom criteria and even optimising the performance of your site. On the downside, learning how to tweak all those settings is akin to learning a foreign language. The tool of Admin Tools is designed to help you create the part of such a file used for security and performance optimisation by utilizing a point-and-click interface.
![[Tip]](/media/com_docimport/admonition/tip.png) | Tip |
|---|---|
|
If you ever want to revert to a "safe default", just set all of the options on this page to "Off" and click on "Save and create nginx.conf". This will create an empty nginx.conf file. |
One very important aspect of NginX is that, unlike Apache, the site configuration file is not magically loaded on every request. When using this feature you will have to do two things:
-
Make sure NginX can load the nginx.conf file. Admin Tools writes the (partial) NginX configuration file
nginx.confin the root of your site. By default, NginX won't even know this file is there! You need to include it in your site's definition file by adding a directive like this:include /home/myuser/www/nginx.conf;
The exact path to the file is shown in Admin Tools' NginX Configuration Maker page itself. You only need to do this ONCE.
If your host doesn't allow you to do that they might be giving you a way to add custom NginX configuration variables. In this case use the Preview button in the NginX Configuration Maker page to get the raw NginX configuration commands and give them to your host for inclusion in the NginX configuration.
If you have a choice between these two methods of providing the custom NginX configuration to your server please use the second one. It's harder to manage but it's far more secure. The first method of having your NginX server include a configuration file off the web root is not a good idea as far as security is concerned: a sly attacker could modify that file to their benefit and just wait for the NginX server to restart. Ideally, that first method should only be used on a private test server which is not accessible from the Internet and only for debugging and development purposes.
If your host doesn't allow you to provide custom NginX configuration, sorry, you're out of luck: you will not be able to use this feature of Admin Tools.
-
Reload or restart your NginX server. Remember that modifying the NginX configuration has NO EFFECT until you reload or restart the NginX server. This is part of what makes NginX so incredibly fast.
FInally, do note that the NginX configuration maker makes the assumption that you've configured PHP to run through FastCGI using the exact method described in NginX's documentation. If you're using a different method to enable PHP on your NginX server the generated configuration may not work on your server or even cause problems accessing your web site.
The top part of the NginX configuration maker page contains the standard toolbar buttons you'd expect:
The NginX Configuration Maker's toolbar
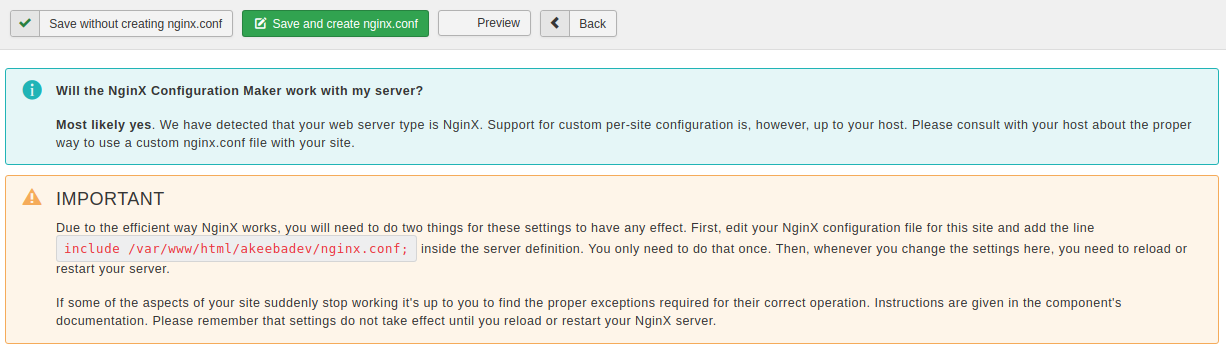
-
saves the changes you have made in this page's options without actually creating the customized
nginx.conffile. This should be used when you have not decided on some options yet, or if you want to preview the generatednginx.conffile before writing it to disk. -
is the logical next step to the previous button. It not only saves the changes you made, but also creates and writes the new
nginx.conffile to the disk. If you already had anginx.conffile on your site, it will be renamed tonginx.admintoolsbefore the new file is written to disk. -
pops up a dialog where you can see how the generated
nginx.conffile will look like without writing it to disk. This dialog shows the saved configuration. If you have modified any settings they will not be reflected in there until you click either of the previous two buttons. -
The button takes you back to the Control Panel page.
Below the toolbar there are five panes with different options, described below. Before you do that, please read and understand the following warning. Support requests which indicate that you have not read it will be replied with a link back to this page.
Basic security
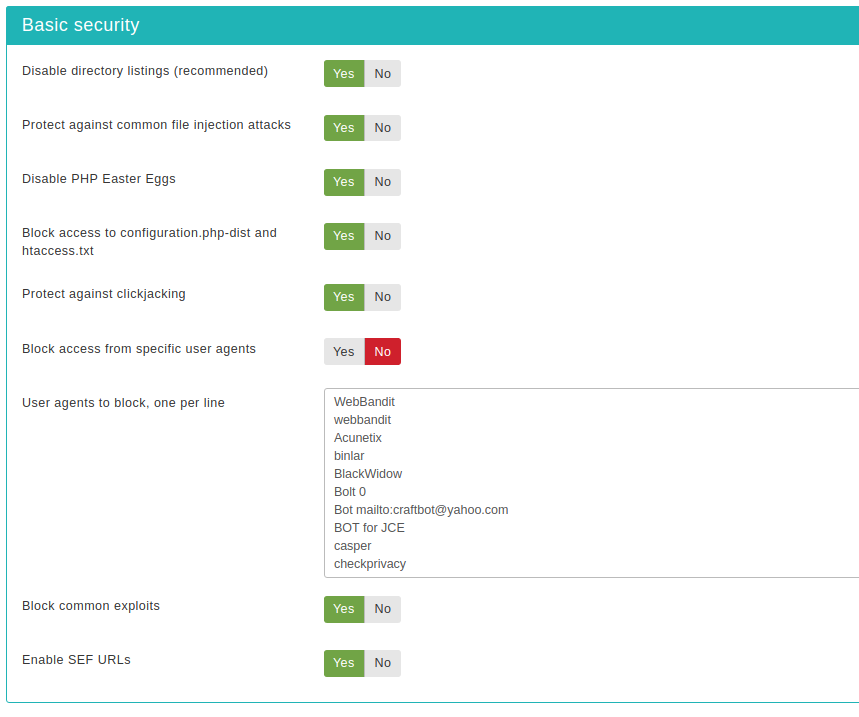
- Disable directory listings (recommended)
-
When disabled, your web server might list the files and subdirectories of any directory on your site if there is no index.html file inside it. This can pose a security risk, so you should always enable this option to avoid this from happening.
- Protect against common file injection attacks
-
Many attackers try to exploit vulnerable extensions on your site by tricking them into including malicious code hosted on the attacker's server. Enabling this option will protect your server against this kind of attacks. This works by preventing any URL which references an http:// or https:// URL in the query string. Sometimes these are legitimate requests. For example, some gallery components use them. In this case you are recommended to use the RFIShield (Remote File Inclusion protection) in the Web Application Firewall and turn this NginX Configuration Maker option OFF.
- Disable PHP Easter Eggs
-
PHP has a fun and annoying feature known as "Easter Eggs". By passing a special URL parameter, PHP will display a picture instead of the actual page requested. Whereas this is considered fun, it is also widely exploited by attackers to figure out the version of your PHP installation (these images change between different versions of PHP) and launch hacking attacks targeting your specific PHP version. By enabling this option you completely disable access to those Easter Eggs and make it even more difficult for attackers to figure out the details of your server.
Note: You are advised to also set
expose_phptoOffin yourphp.inifile to prevent accidental leaks of your PHP version. - Block access to configuration.php-dist and htaccess.txt
-
These two files are left behind after any Joomla! installation or upgrade and can be directly accessed from the web. They are used by attackers to tell the Joomla! version you are using, so that they can tailor an attack targeting your specific Joomla! version. Enabling this option will "hide" those files when accessed from the web (a 404 Not Found page is returned), tricking attackers into believing that these files do not exist and making it slightly more difficult for them to deduce information about your site. This option also hides the web.config.txt file included in Joomla! 3 and later for use with the IIS server.
- Protect against clickjacking
-
Turning on this option will protect you against clickjacking. It does so by preventing your site's pages to be loaded in a, Frame, IFrame or Object tag unless this comes from a page inside your own site. Please note that if your site relies on its pages being accessible through frames / iframes displayed on other sites (NOT on your site displaying content from other sites, that's irrelevant!) then you should not enable this option. If unsure, enable it.
- Block access from specific user agents
-
When enabled, it will block any site access attempt if the remote program sends one of the user agent strings in the User agents to block, one per line option. This feature is designed to protect your site against common bandwidth-hogging download bots and otherwise legitimate tools which are more usually used for hacking sites than their benign intended functionality.
- User agents to block, one per line
-
The user agent strings to block from accessing your site. You don't have to enter the whole UA string, just a part of it. The default setting includes several usual suspects. Separate multiple entries by a single newline character (that is a single press of the ENTER key). Do note that some server with mod_security or mod_evasive installed will throw an "Access forbidden" message if you try to save the configuration settings when this field contains the word "WGet". If you come across this issue it is not a bug with Admin Tools or Joomla!, it is a server-level protection feature kicking in. Just avoid including the word Wget and you should be out of harm's way.
- Block common exploits
-
Enabling this option will include a set of options recommended by Joomla! to protect against (obsolete) common exploits which no longer have any effect on Joomla! 2.5 and later. It's still a good idea to enable this option.
- Enable SEF URLs
-
Enabling this option will allow your site to use SEF (a.k.a. "beautiful") URLs, with or without index.php in them. You are recommended to leave this option turned on unless you have a custom URL forwarding setup already in place.