PHP File Scanner: Reading the reports
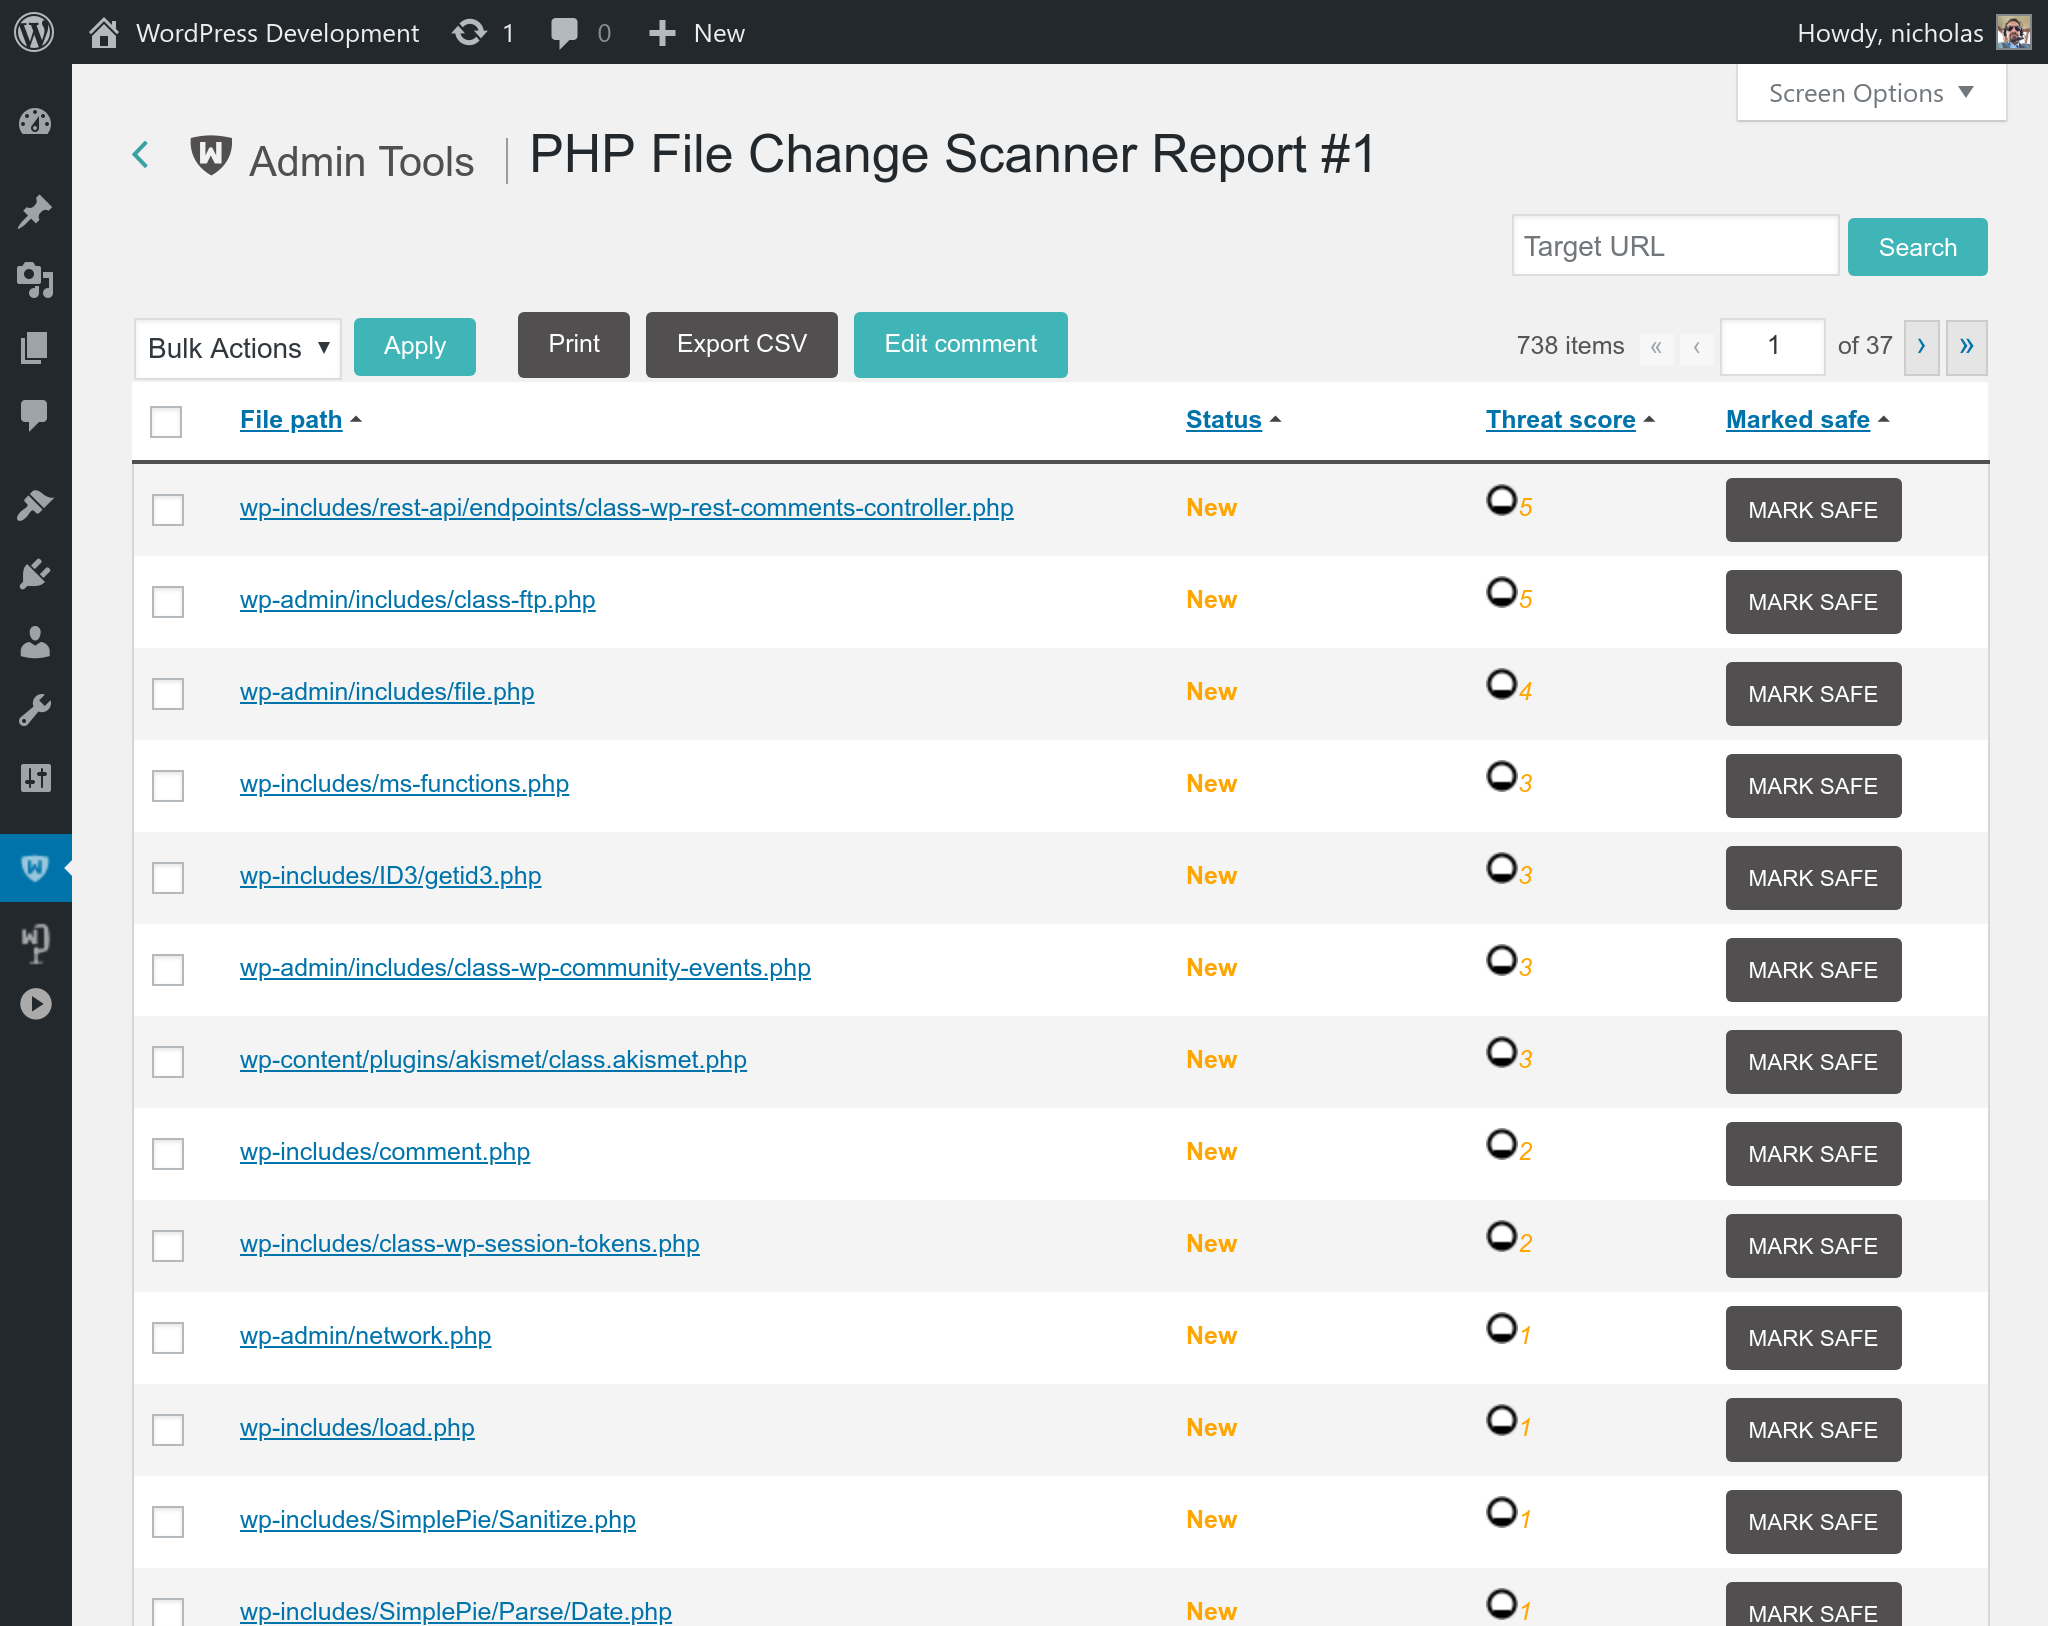
The report view of the PHP File Change Scanner allows you to navigate through the results of a file scan operation, enabling you to review any suspicious files. Each row contains the following columns:
-
File path is the path and name of the file, relative to your site's root directory. Clicking on it will open the Examine File view for that file.
-
Status can be one of:
- New
-
A file which was added since the last file scan. When you scan a site for the first time, all files will have this status. This could be a file created by your installed extensions, a file you uploaded yourself, a file added during an extension upgrade or a hacking script.
- Modified
-
A file which was modified since the last file scan. A file can be modified because you edited it, an extension update replaced it or because the site was hacked.
- Suspicious
-
A suspicious file is a file which did exist during the previous scan, has not been modified and has a non-zero Threat Score. This does not necessarily mean that the file is hacked or that it has a nefarious purpose. Please see the discussion regarding the Threat Score below.
If a file has a non-zero threat score (therefore potentially dangerous, see below) the status will appear in bold letters.
-
Threat Score. The higher this number is, the most likely it is that the file is hacked or nefarious. Please note that a high threat score does not necessarily mean that the file is hacked or a hacking script. Likewise, a low but non-zero threat score (1-10) does not necessarily mean that the file in question is necessarily safe. The number is merely A PROBABILITY INDICATOR. Admin Tools prefers to err on the side of caution. This means that false positives (high threat scores for perfectly safe, not hacked files) are all too common. For instance, Admin Tools' own file, Akeeba Backup Professional's files, a few WordPress core files and some third party plugin files have high Threat Scores. None of these files is hacked or nefarious. In order to understand why that happens, let's take a look at what the Threat Score is and how it's calculated.
Whenever Admin Tools Professional encounters a new or modified file, it calculates a "threat score". This is a weighed sum of potential security "red flags". Essentially, Admin Tools Professional runs a few heuristics against the PHP file in question, looking for code patterns which are commonly (but NOT NECESSARILY) used in hacking scripts and hacked files. Each of those patterns is assigned a "weight". The weight is multiplied by the number of occurrences of the pattern to give a score. The sum of these scores is what we call a "threat score". How to interpret it: the higher the threat score, the more probable it is that this could be a nefarious file and its contents should be manually assessed.
The first thing you should do is to compare the file you have with the same file from a fresh installation of WordPress and the plugin this file belongs to. For example, let's say that you get a high threat score for the
wp-content/plugins/foobar/example.phpfile. From the file path you can understand that it's part of a plugin called Foobar. Install a new WordPress site on a local server and install Foobar on it. Find thewp-content/plugins/foobar/example.phpfile on the new site and compare it with the one from your regular site you are using the PHP file comparison on. A very handy tool to compare files is WinMerge. If you're not on Windows or Linux (the platforms supported by WinMerge) you can search for graphical diff or file comparison tools for your platform. In any case, if the files match then the file is safe. In this case you can click on the icon in the Marked Safe column so that it turns into a green checkmark. When you do that, future scans will not report the file unless it is changed.A simple way to get started is running the file scanner on a pristine copy of your site, i.e. you know it's not hacked. By definition you can mark all suspicious files as safe. See below.
-
Marked Safe. All files with a non-zero threat score will appear on each and every scan as Suspicious. Obviously, you don't want to go through the tedious task of manually verifying files as described above for each and every scan. Marking a file as safe tells Admin Tools that this particular file, in its current state, is not suspicious and should not be reported again as suspicious unless it's modified. Unmarking the file (default) will report this file as suspicious during the next scan.
![[Tip]](/media/com_docimport/admonition/tip.png)
Tip If someone hacks your site, he could run a scan, mark the hacked files as safe and then run yet another scan in an attempt to hide his tracks. If in doubt, just delete all of the scans and run a new scan. This effectively resets the "Marked Safe" status of all files and will reassess the threat score of all files on your site, just like the very first scan you did on that site.
You can print the report by clicking on the Print button on the toolbar. The button will print out all of the files on the report, not just the ones you currently see on your screen. It is advisable to print out the result in landscape (not portrait) orientation. Moreover, the button will export the entire report in a comma separated values (CSV) file which you can them import in Microsoft Office Excel, Apple Numbers, OpenOffice.org/LibreOffice Calc, Google Docs spreadsheet or any other desktop or on-line spreadsheet application.
The button will mark all files with a non-zero threat score on the current report as Safe. It is advisable to do that only in the following case. Take a new scan, make sure it has no new or suspicious files. Run any updates on your site. Take a new scan; the update files appear as new, modified and / or suspicious. Use the Mark All as Safe button to mark these files as Safe. These files were installed during the update and are trusted (as far as you can trust the developers which supplied them). Please note that if you do NOT trust the source of a particular update you should not use this button. A good reason to not necessarily trust the update is if the software you are updating has recently (e.g. in the last 12 months) been taken over by a new developer. There are many cases where legitimate software was bought out by shady people who waited for a few months before ultimately publishing an update with malware hidden in it. Therefore we strongly recommend that you exercise abundant caution with code coming from a new developer who has recently taken over established, legitimate software.
The Examine File view
When you click on a file name, the Examine File view opens. In this view you can view detailed information about the file, as well as the file itself.
In the File Information pane you can see the generic file information you would see in the Report view.
Below that you can find the Current file source pane. Please note that this pane shows you the contents of the file as it is right now. This may or may not be equal to the contents of the file which was scanned. If the fie has since been deleted, you will see an empty pane. The places were suspicious code patterns have been found will be highlighted in yellow background.
If you have enabled the diff feature in the component's configuration page and this is a Modified file, you will also see the Diff to the previous version pane. On this pane you will see the consolidated differences between the scanned file and its previous state.